SimpleClinic can be used to manage registrations for workshops and events, take bookings and online payments. This article describes how to create workshops/events in SimpleClinic.
On this page:
- Creating a Workshop
- Registering for a Workshop
To view Workshop registrations - please see this article
Before getting started, please bear in the following notes when using workshops:
- Workshops do not auto save, you will need to click the save button to save your information.
- Banner images can only be in JPG, sized at 1024px x 400 - 500px
- Only one banner image can be used. Images cannot be added to description and address fields.
- Payments for workshops can only be processed if you have a payment gateway connect to Business Setup -> Integrations.
Creating a Workshop
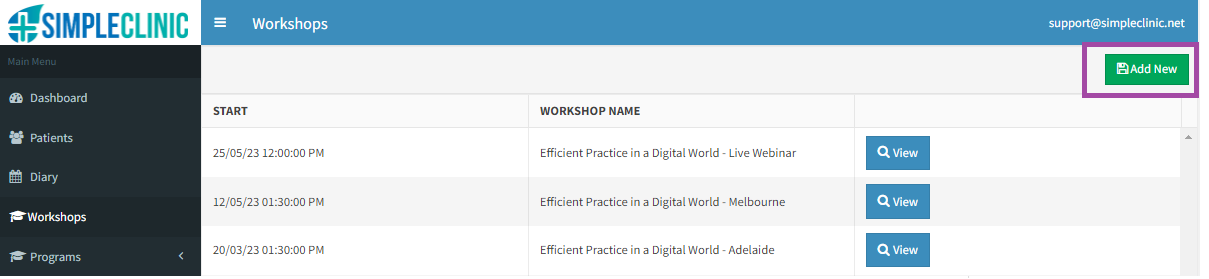
1. Select the Workshops option from the main navigation menu on the left. Workshops and events cannot be booked directly from the Diary screen.
The initial screen will show a list of all events, in descending date order. When there are events to display, they can be viewed to open them and check or edit the event details, or the event can be deleted.
2. Click on the Add New button to create a new event.
3. Complete the fields on this screen as below:
- Event title – type in a descriptive name
- Start and End dates and times – use the date and time picker buttons
- Ticket price – enter the cost, or 0 if free!
- Unique Event URL – when the event is saved, this field will be automatically filled with a website address, which can then be used on your website, Facebook page, or a third party booking service, for clients or the public to book into the event
- Practitioner – an event must be linked to a practitioner, and the events and times will be blocked out in their Diary
- Linked Invoice Item – a paid event can be linked to an invoice item which will appear on the invoice for the booked in clients. You will need to create this in the inventory FIRST, using these steps: How to add new inventory items, ensure to click save before you navigate away to create an inventory item.
- Banner image – a picture for the event which can be used. Banner images can only be in JPG, sized at 1024px x 400 - 500 px. Only one banner image can be used. Images cannot be added to description and address fields.
- Workshop description – the event details. Use the formatting buttons as needed.
- Address – location details of the event. Or if online, add online information.
- Coupon - you can add a coupon to give to special clients for a discount on a paid workshop.
- Once added, click SAVE

4. If adding a coupon, click the Add Coupon button and complete the details as below -> SAVE
5. If adding more than one coupon, repeat step 4 -> SAVE

Registering for a Workshop
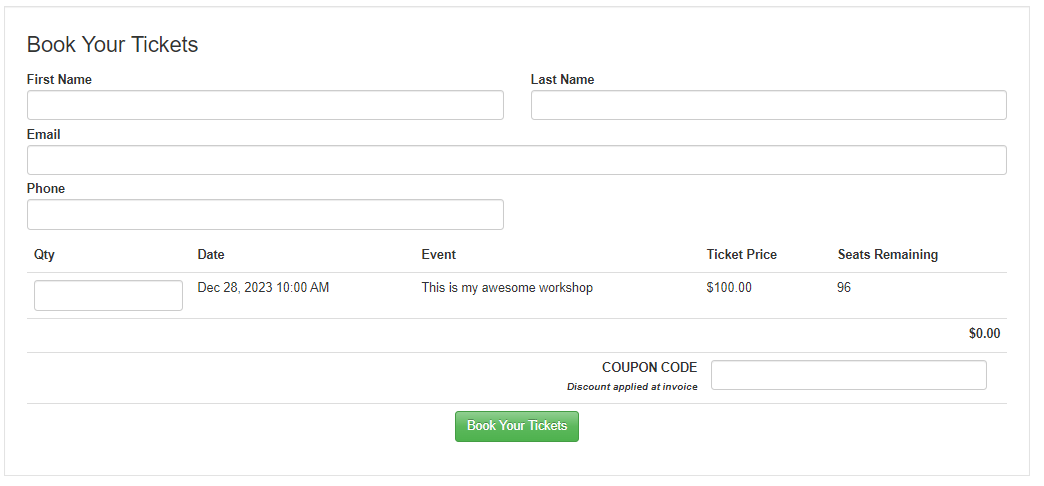
6. When a patient goes to the public URL they will see the below screen to enter their details and pay (if there is a cost).
They can also add a coupon code here which will be applied to the invoice when they select 'book your tickets'
People who book in for any event will be added to the clients list, if they haven't been added before. And if you have email integration enabled, their details will also be added to the email list for future marketing.
7. After clients book in for the event, they will receive the below confirmation of their booking:

Please note: The Social Media icons on the event page are sharing tools for patients to share your event on their socials, not links to your socials.
How to view workshops registration, click here.